In this exercise I have considered different lighting and techniques to adequately light a subject and also manipulate the light for different desired effects.
The first type of light I used was simply window light. I like window light because it can be directional, diffused and clean:

I have used the window light to completely light one side of the face with the other side casting some shadow from the nose giving the impression of depth. For a more detailed look I have added a silver reflector to light the right side of the face by bouncing the window light:

In this photo the face has is more evenly lit showing more detail.
I carried out this exercise when everyone was preparing for Halloween which gave me idea to use some dramatic studio lighting to light the face giving a darker feel as if to appear scary:

We are used to seeing faces lit from above by the sun casting shadows on the eyes and lips but to create this menacing look I pointed a studio light (no diffusion) upwards towards the face. It created a more sinister look casting shadows on the nose, cheeks and forehead but leaving the eyes brightly lit making them a focal point. I tried getting the subject to look menacing too but he had a natural smile and it looked much better.
Again, within the Halloween theme, I added a green diffuser to a studio light for this ghoulish inspired portrait:
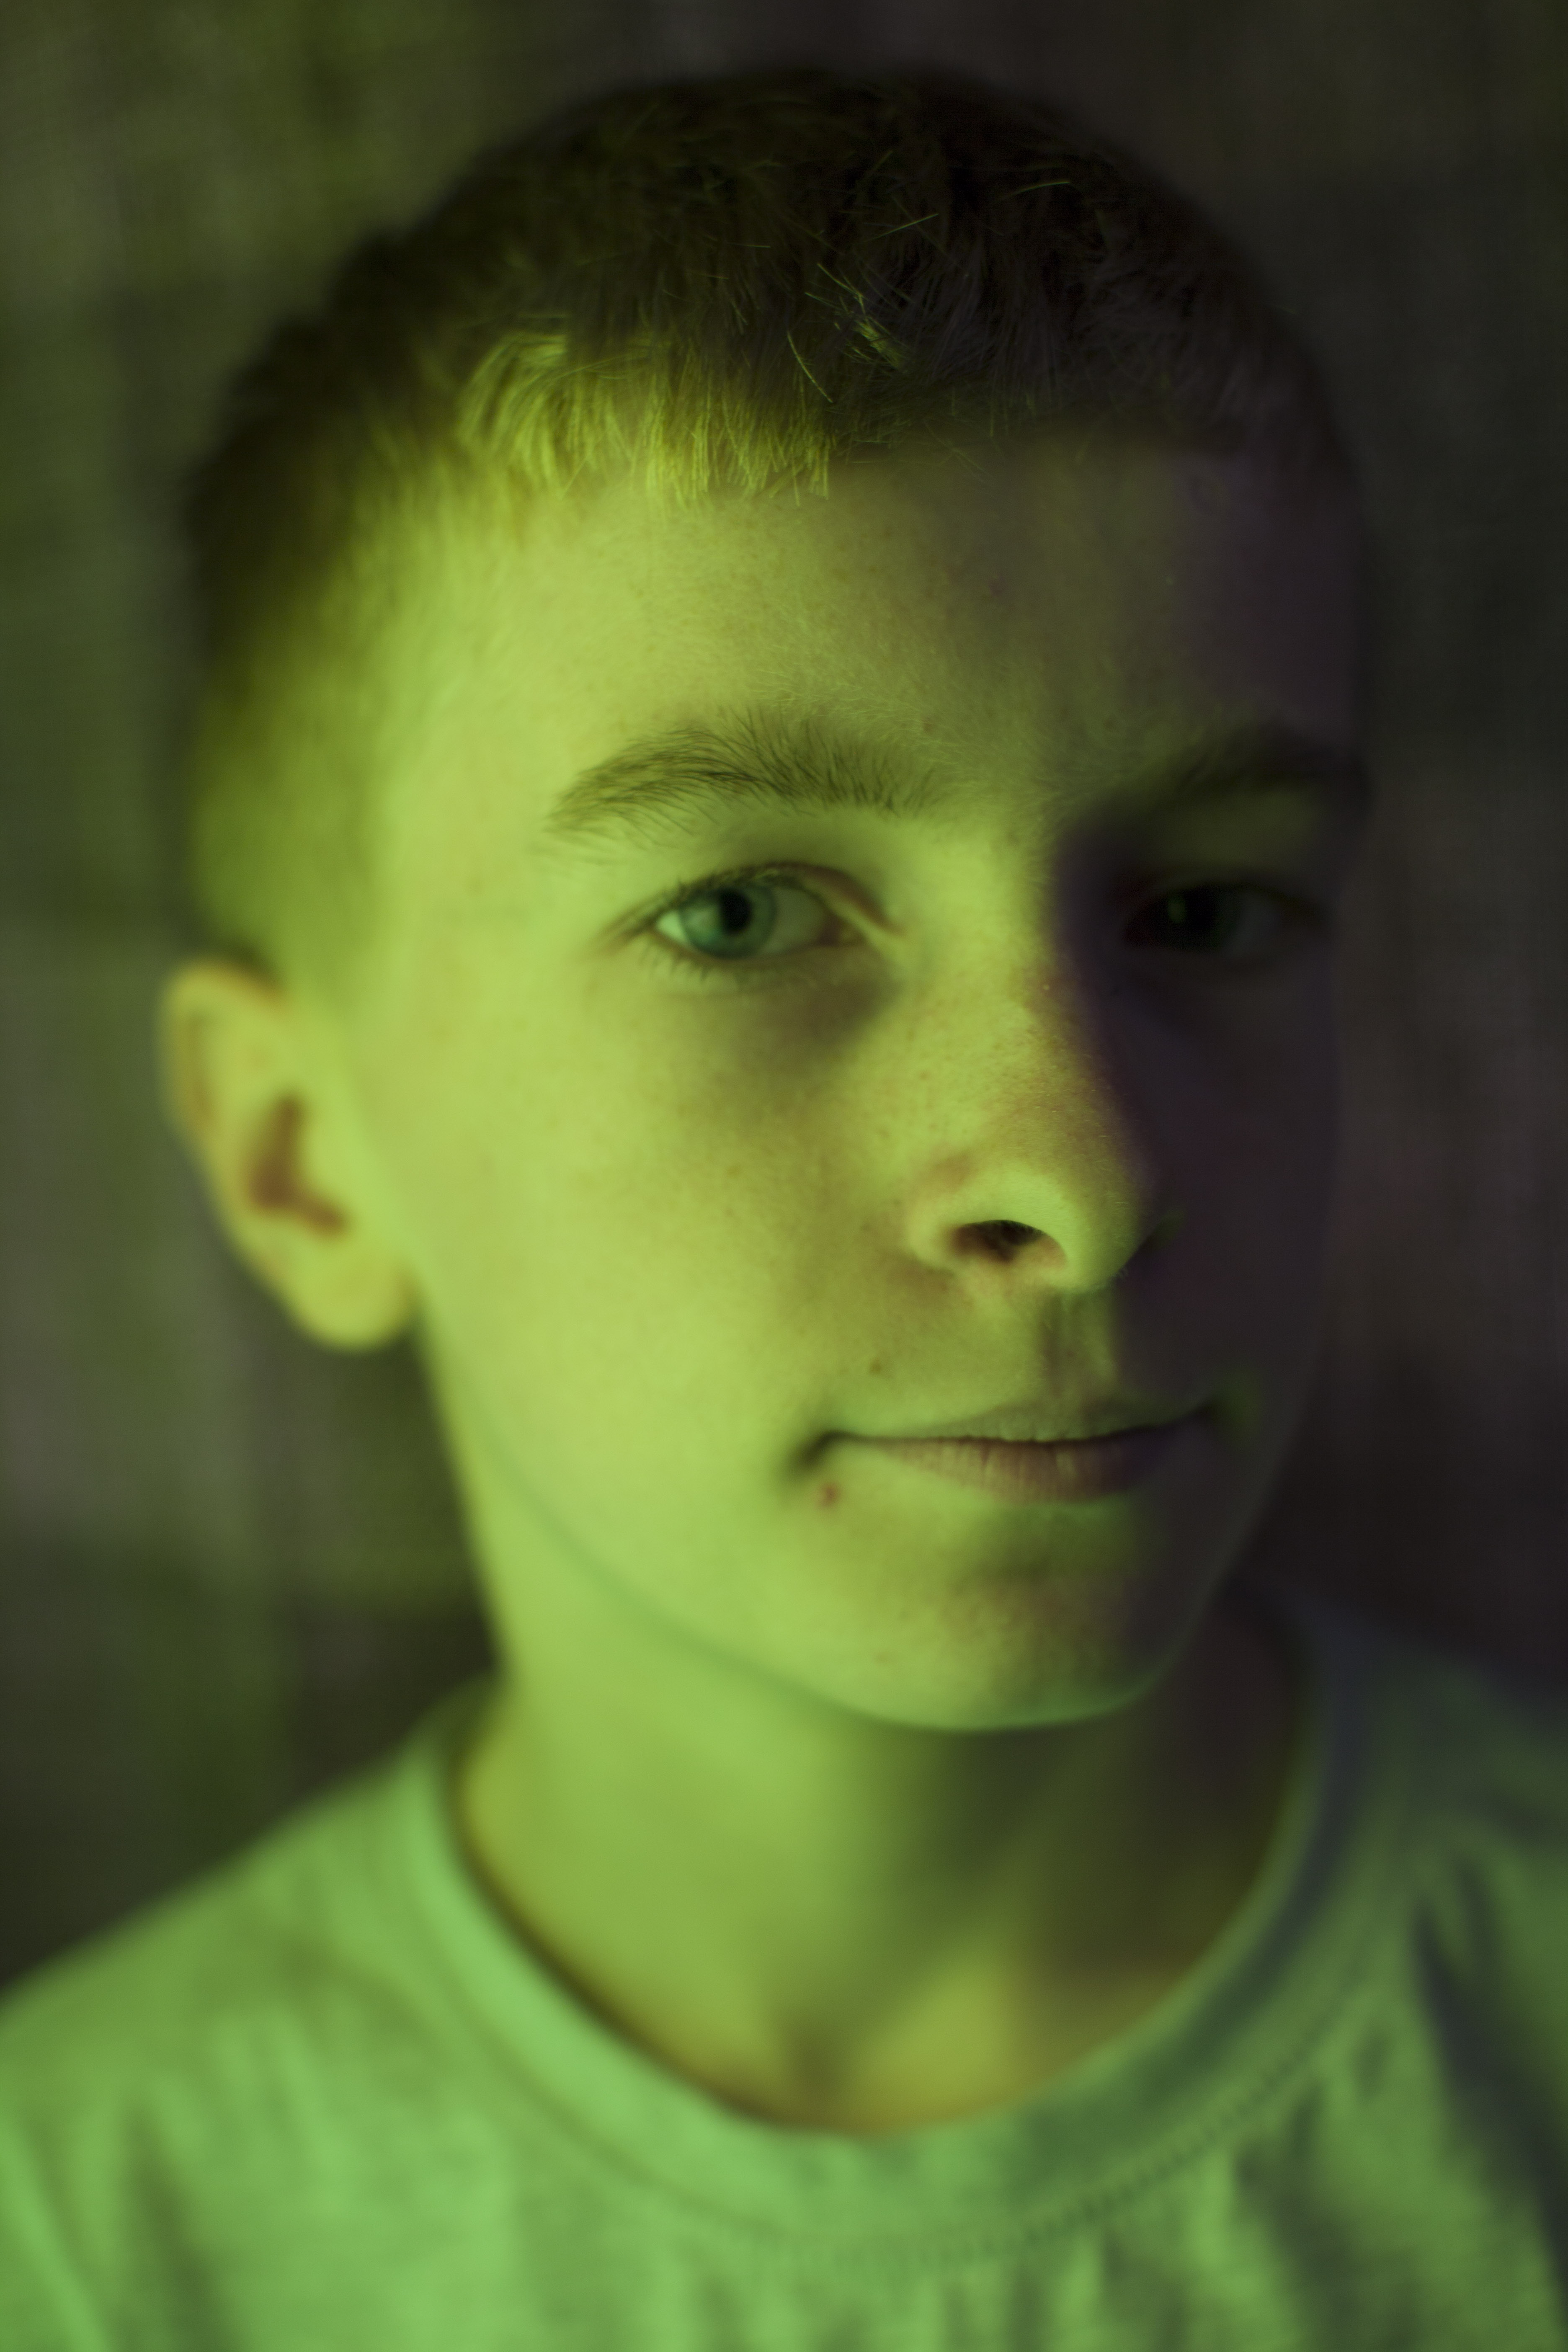
The aim here was to only light one side of the face so the studio light was placed at face level to one side. I wanted the green diffuser to be subtle and the right side of the face to be almost hidden in shadow. I think it’s worked but in hindsight I should have used a black background and no fill light. The effects would have been more dramatic.
Direct sunlight, in my opinion, is the best type of light to use. The problem is getting it just right. I know how odd this sounds as we have no control over the light shining down from the sun but we do have control over the time of day and location we use. The sun is at its brightest when it directly above generally during mid day. When the sun is high in the sky it will cast deep dark shadows on the eyes and that is your subject isn’t squinting. When the sun is lower, earlier morning or later afternoon it casts long shadows on full body portraits in addition to anything thing in the background that stand upright such as buildings and trees. The position that you stand or sit has a huge effect on the overall photograph. I always used to ask my subjects to face the sun but his produces scrunched up faces and hidden eyes unless there are clouds in the sky to diffuse the light. If the sun is bright I tend to ask my subjects to put their backs t the sun so avoid squinting and use a flash to add light. This works quite well if you have a flash to hand. I have got into the habit of carrying silver foil in my camera bag so I can reflect the light onto my subjects if it’s just a head and shoulders shot. For this next photograph I asked my subject sit on some steps with a wall either side that wasn’t very tall. This eliminated any harsh light although I chose to shoot the photo late afternoon when I knew the light wouldn’t be so harsh:

As you can see there is some darkness in the eyes although the overall light is quite good. I added a gold diffuser to add some warmth to skin and light up the eyes to show more detail:

I think this is a far more pleasing photograph. The light is a nice temperature and the face is nicely lit showing all the detail of the face.
I feel like I’m literally scratching the surface of lighting techniques here and within six photographs can only show a very small example of what can be achieved. On a lighter note, I’m convinced that my dog can be used as a reflector:
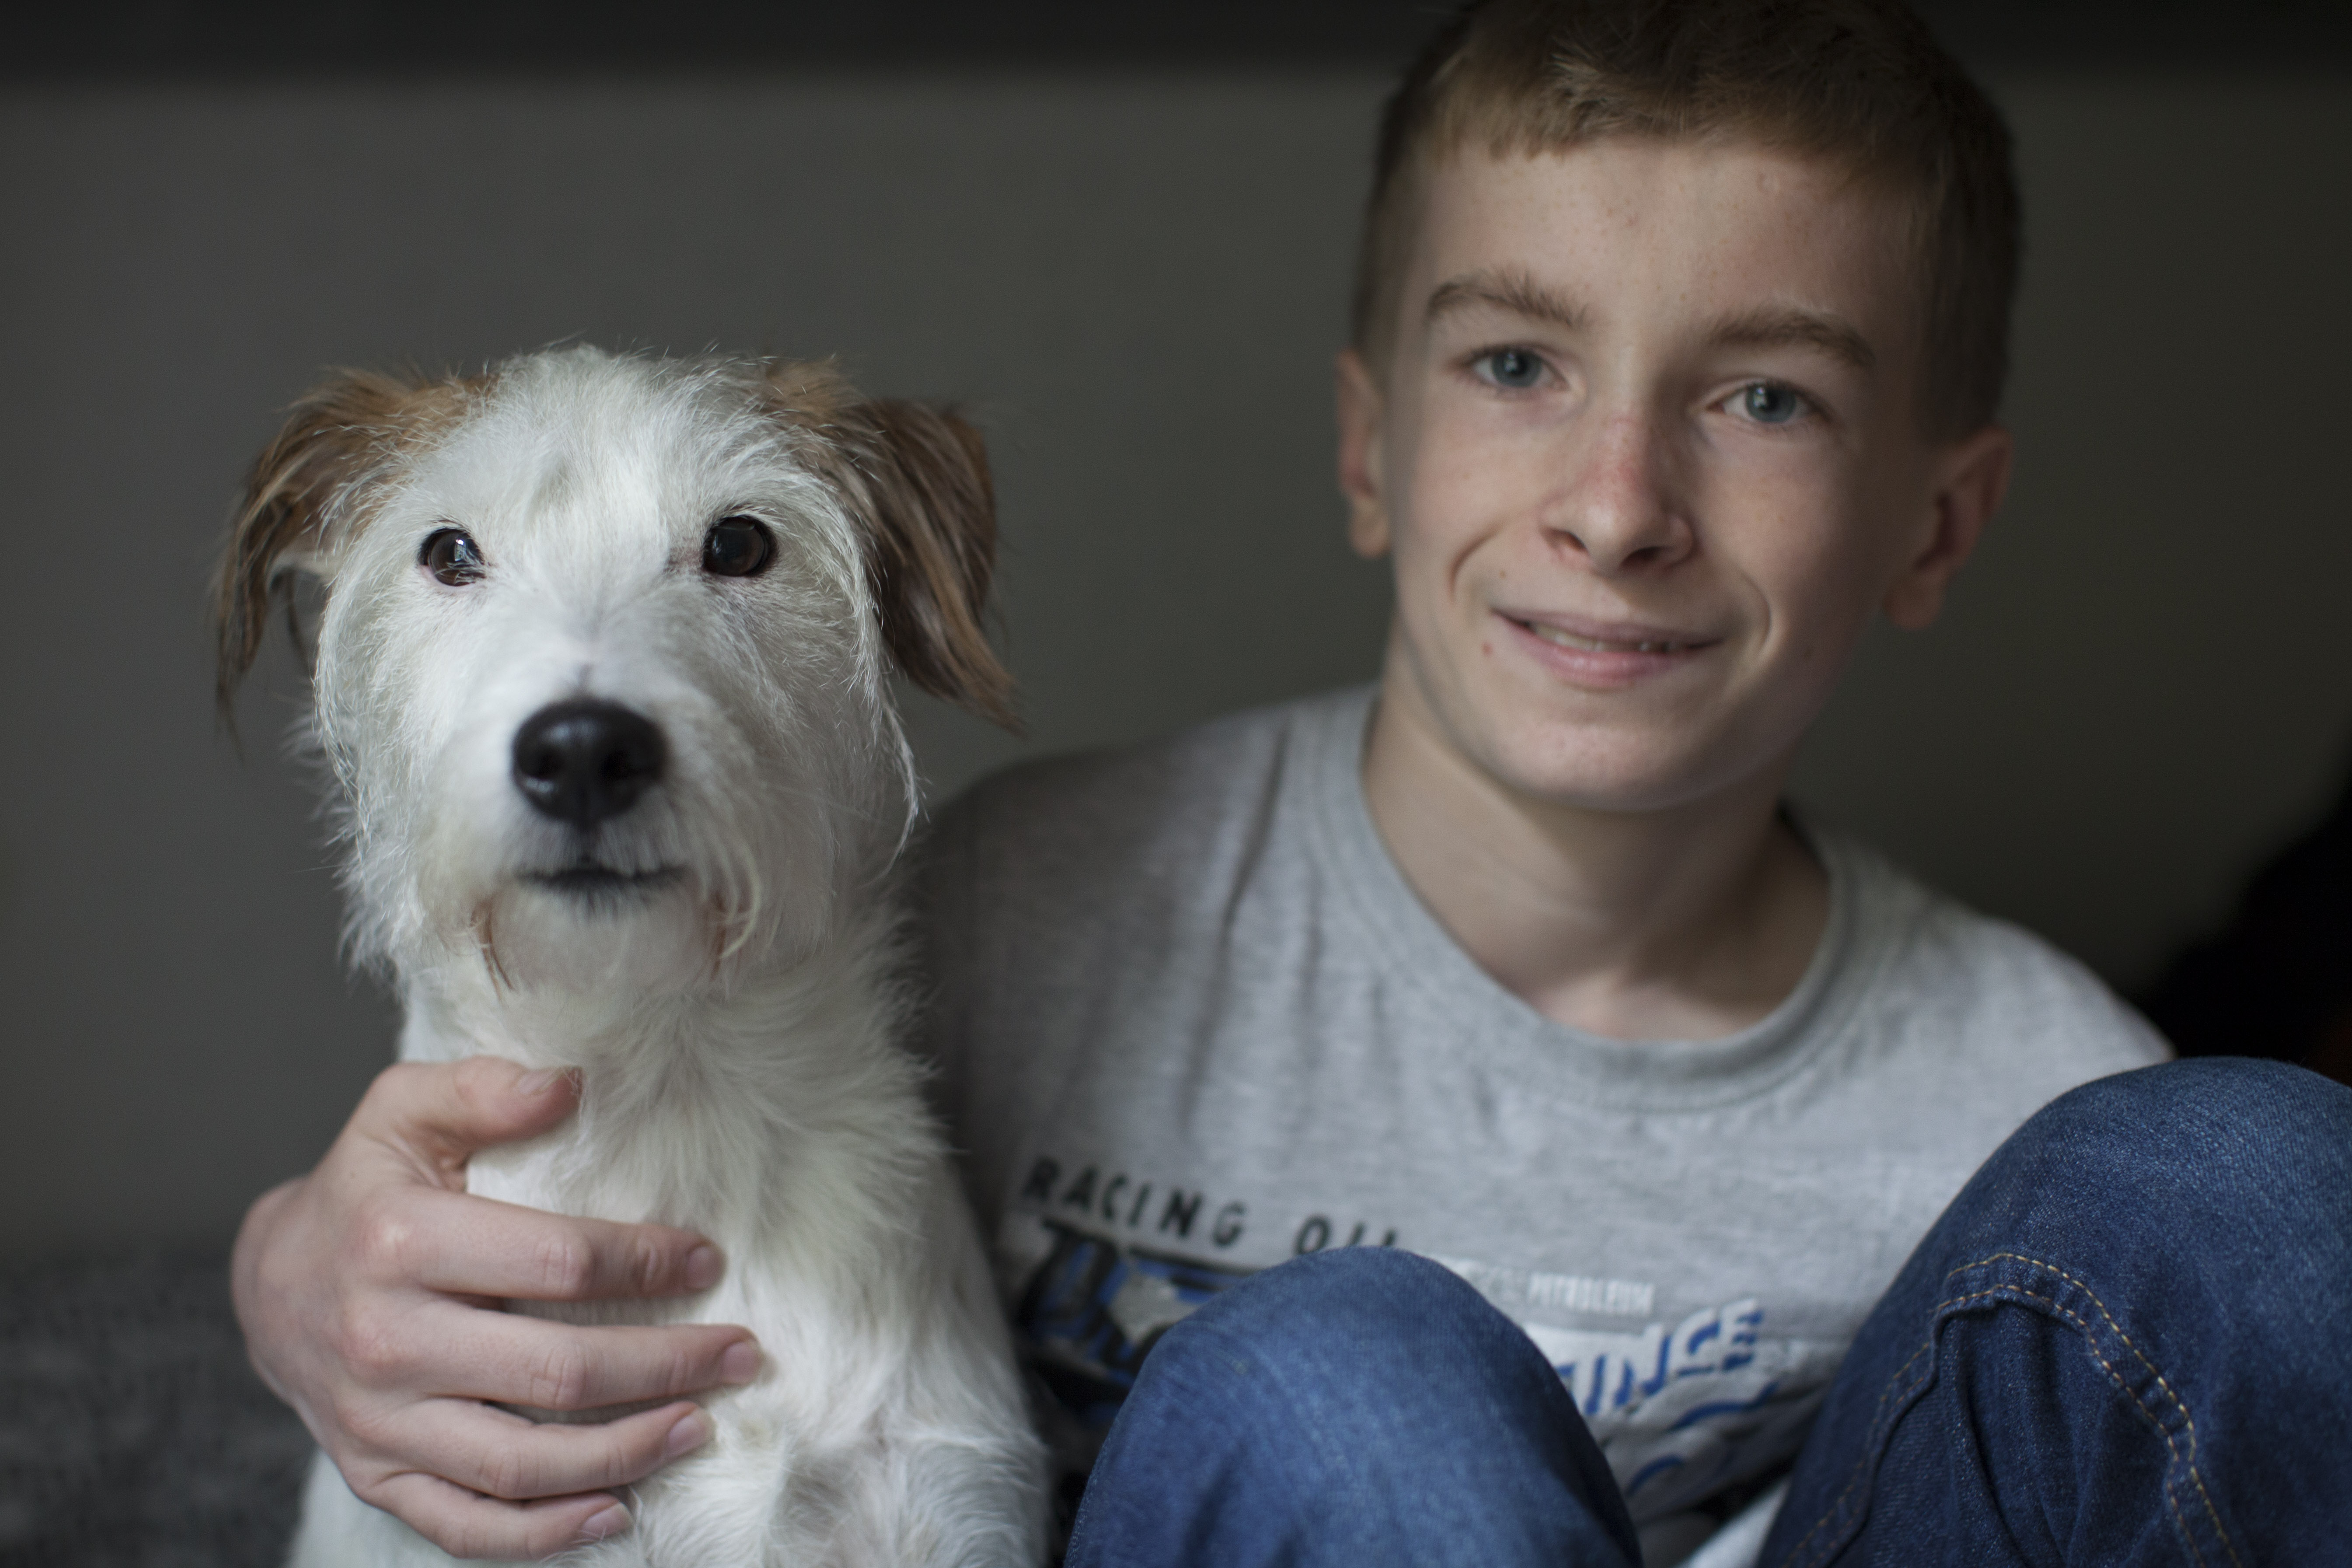
His white fur seems to be reflecting light onto my subjects face here where it should be in shadow. If you think outside the box there are lots of things you can use to reflect light without spending any money!
